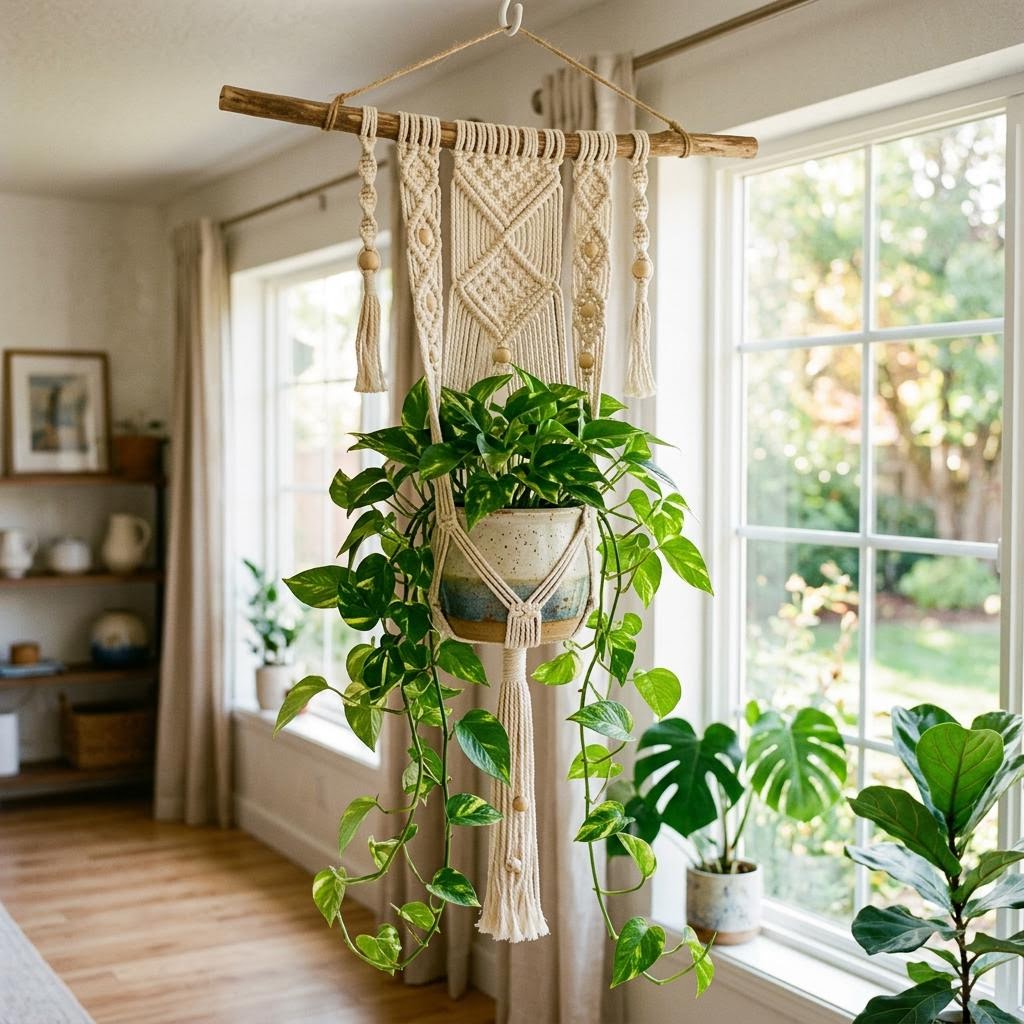
Create a beautiful macrame plant hanger with this quick tutorial.
My first macrame plant hanger took three hours, involved approximately forty-seven swear words, and ended up completely lopsided. My second one took forty minutes and looked genuinely good. That gap between first and second attempt is smaller with a macrame plant hanger than with almost any other craft — which is why I recommend it constantly to people who want a satisfying, visible result without a steep learning curve.
For a standard hanger that holds a 4–6 inch pot, you need eight cords cut to about 3 meters each, a 2-inch wooden or metal ring, and 3–4mm single-strand cotton macrame cord. That's really it. The whole project uses basically three techniques: folding cords onto a ring with a lark's head knot, tying square knots (or half-square spirals if you want a twist), and finishing with a gathering knot at the bottom. Master those three things and you can make a dozen different variations.
Cord tension is the thing nobody talks about enough. Every square knot should be pulled to the same tightness. Too loose and the basket section sags and drops the pot; too tight and the whole thing twists. Beginners almost always start too loose, then overcorrect and go too tight. The trick is to work with the cord hanging vertically — clip your ring to a hook or door handle, work standing up, and let gravity help you keep things even.
The basket section — the four pairs of cords that cradle the pot — is where spacing matters most. Hold your actual pot inside as you work the alternating square knots, checking that the spacing feels snug. Different pot shapes need different spacing. A tapered terracotta pot needs tighter spacing low and wider spacing high; a straight-sided plastic pot needs even spacing throughout. Always fit-check before tying off.
Choosing between square knots and half-hitch spirals is mostly an aesthetic decision. Square knots give a flat, structured look. Half-hitch spirals (just half of a square knot, repeated) give a twisted, more organic look. Spirals are actually easier — fewer steps per section — so if you're nervous about knot consistency, go the spiral route. The twist naturally disguises any tension variation.
Finishing with a gathered knot at the bottom pulls everything together and gives the hanger a clean, professional look. Trim the tail cords anywhere from 5cm to 30cm depending on how much fringe you want, then comb out the fibers with a stiff brush for that fluffy, boho tassel effect. Or leave them unraveled if you prefer a more rustic look. Either way, that first plant going in is a genuinely satisfying moment.
Materials You'll Need
- Macramé cord (3mm or 4mm, 30 meters)
- Wooden or metal ring (2 inch)
- Scissors
- Measuring tape
- A potted plant for fitting
Step-by-Step
Cut Cords and Attach to Ring
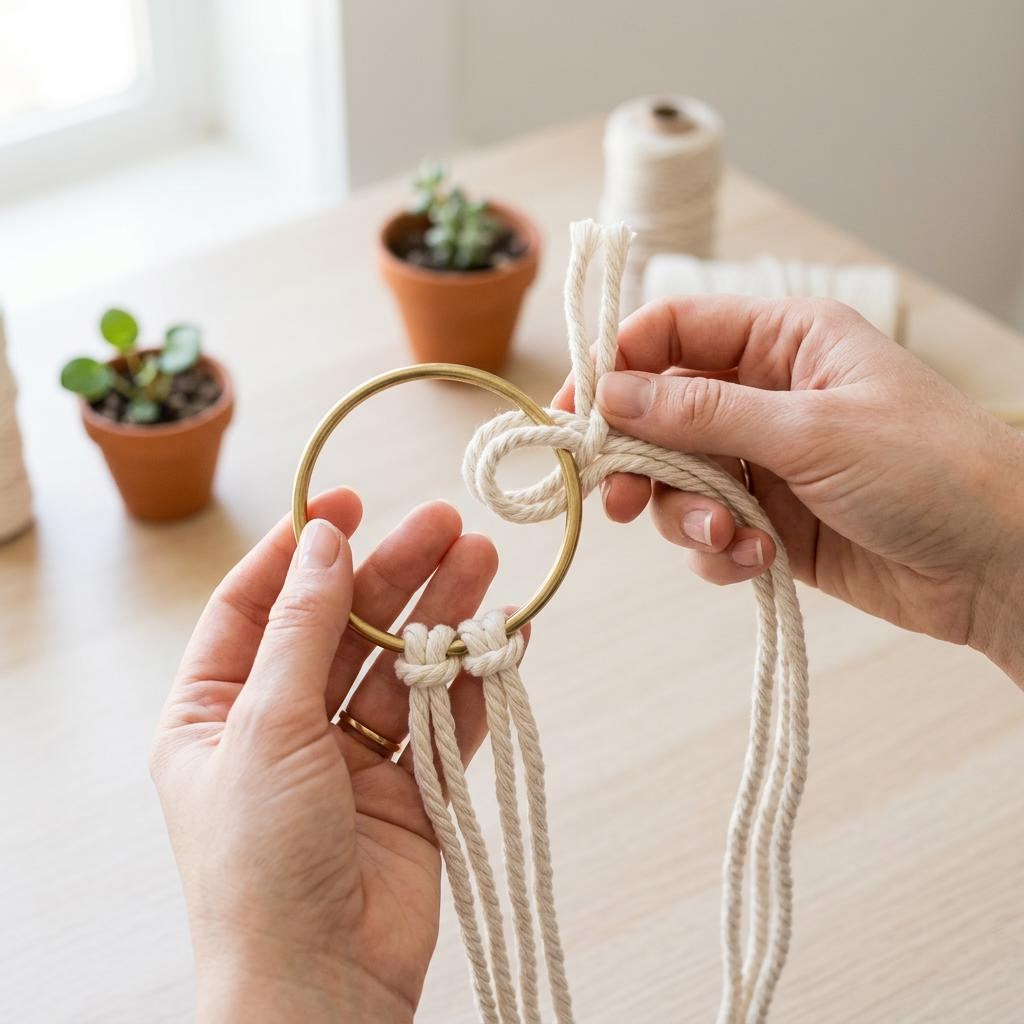
Cut 8 cords, each 3 meters long (for a hanger that holds a 4-inch pot). If you're using 4mm cord for a heavier pot, add another 50cm per cord. Fold each cord in half and attach it to your ring using a lark's head knot: fold the cord over the ring, pull both tails through the loop, and pull snug. You'll end up with 16 working strands hanging from your ring. Hang your ring from a sturdy hook at about eye level — a curtain rod, a door handle, or a dedicated macrame rack all work. Working vertically is important; it lets gravity do some of the tension management for you and makes it much easier to see whether your knots are even. Divide your 16 cords into 4 groups of 4. At this stage, wrap each group loosely with a rubber band or clip to keep them out of the way while you work on adjacent sections. Tangled cords are the main source of frustration in macrame — a few seconds of organization now saves many minutes of untangling later. Check that your lark's head knots are all the same size and evenly spaced around the ring before moving on.
The Wrapped Knot (Gathering Knot)
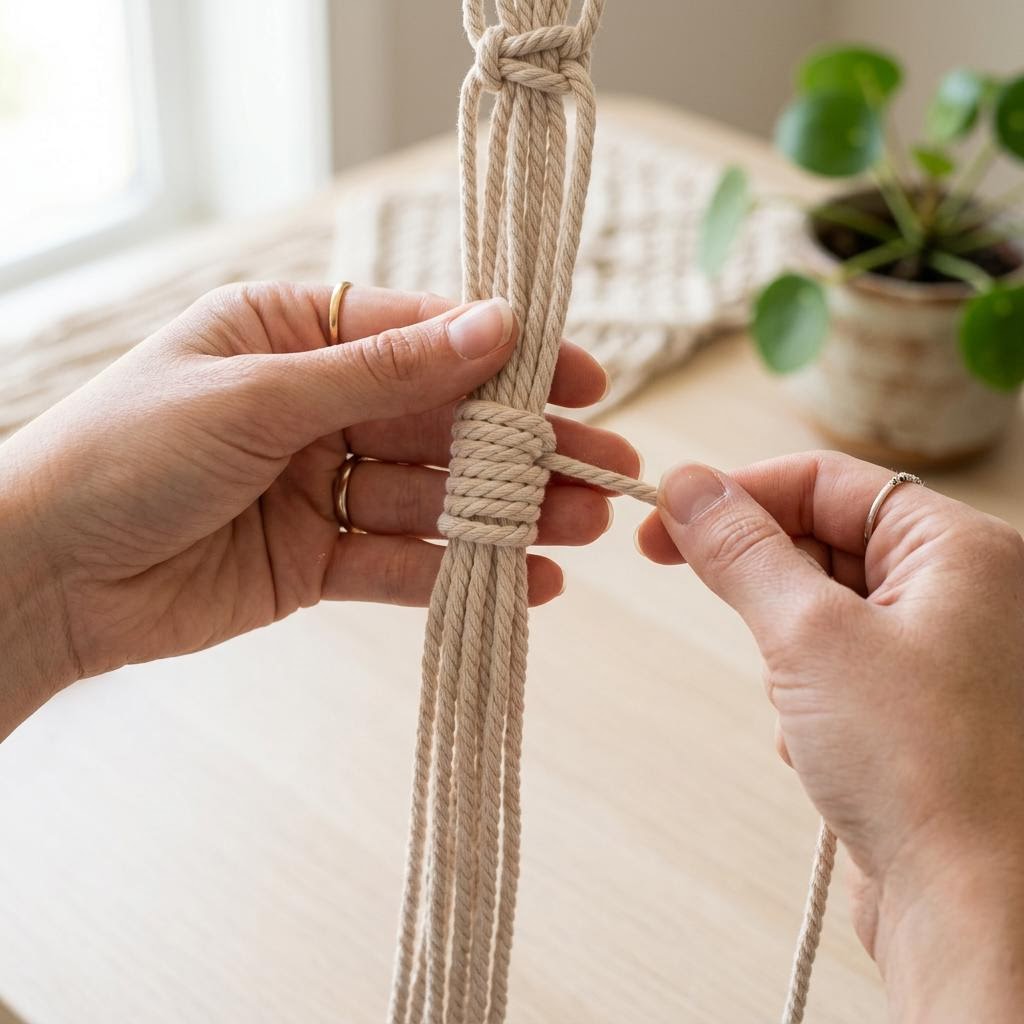
A gathering knot (also called a wrapping knot) bundles all 16 cords together just below the ring. Take a separate 40cm piece of cord and fold it into a U shape, laying it against the bundle with the loop pointing downward and both tails pointing up. Wrap the long end tightly around all the cords and the short loop, working downward — about 8–10 wraps for a knot roughly 2.5cm long. When you've reached your desired knot length, push the wrapping end through the exposed loop at the bottom, then pull firmly on the top tail to draw the loop — and the working end with it — up inside the wrapping. This locks the knot in place. Trim both tails close to the edge of the wrapping so they disappear into the bundle. The gathering knot should feel solid and not slide. If it slips when you tug on it, the working end didn't get caught by the loop — unwrap and try again. This knot is used at the top to group all the cords below the ring, and again at the very bottom above the fringe. Getting it right the first time saves you from a loose, unraveling hanger.
Creating the Arms (Square Knots or Spirals)
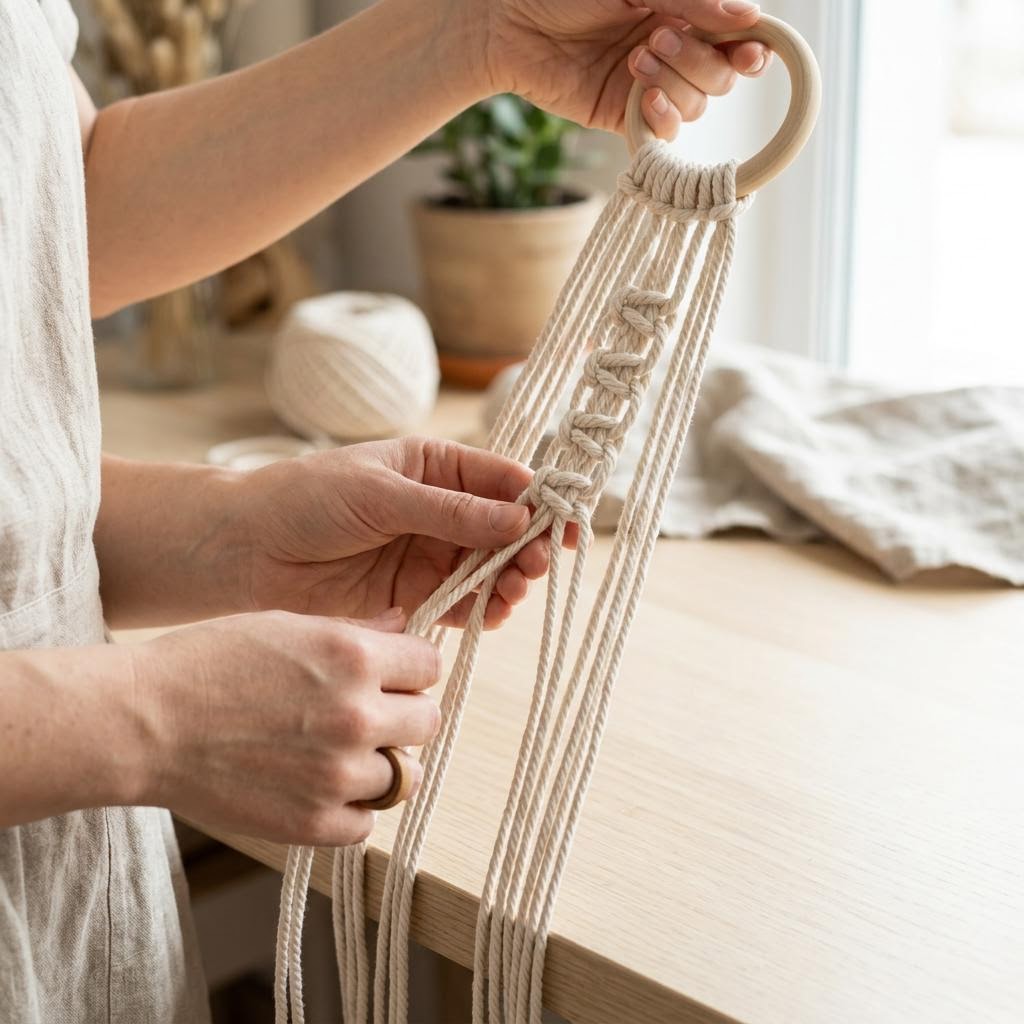
Separate your 16 cords back into 4 groups of 4. On each group, leave about 10cm of bare cord below the gathering knot — this becomes part of the decorative length before the basket section. Then tie a series of square knots or half-hitch spirals down each arm. For a simple hanger, 3–5 square knots per arm is plenty, covering about 10–15cm. For a square knot: the two outer cords are the working cords, the two inner cords are passive (they just get wrapped around). Take the left cord, cross it over the two center cords and under the right cord. Then take the right cord under the two center cords and up through the loop on the left. Pull firm and even. That's half a square knot. Repeat the mirror image to complete the full knot. For a spiral (half-hitch), just do the left-over-right half of that knot, repeatedly, without doing the second half. The arm will naturally rotate as you work — don't fight it, that's the twist forming. Aim for even spacing between knots. Measure with your fingers: one finger-width gap between knots looks clean and consistent at this scale.
Forming the Basket and Final Knot
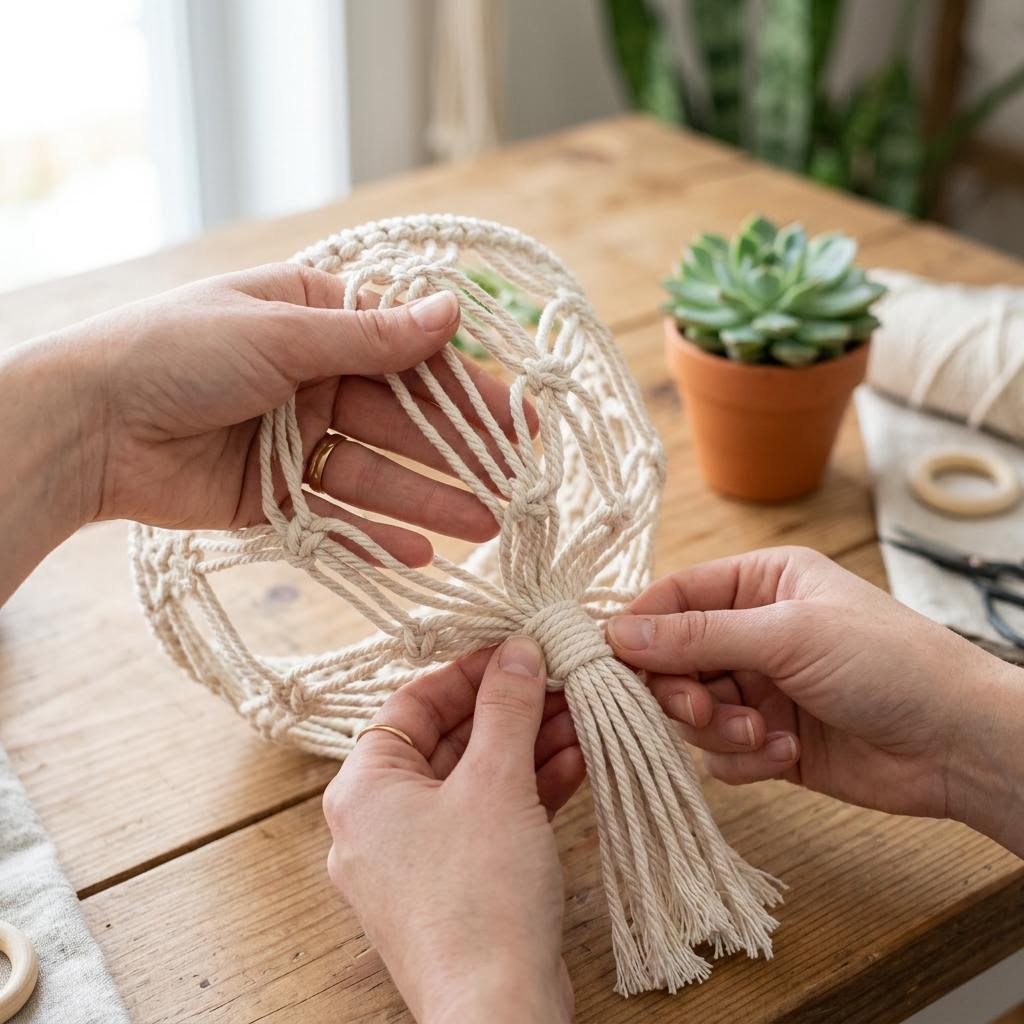
The basket is formed by alternating the cords between adjacent arms. Take 2 cords from one arm and 2 from the neighboring arm, tie one square knot, and repeat around all 4 arms. This creates the cradle that holds the pot. Leave a gap of 4–6cm between the arm knots and the basket knots — this gap is what holds the pot in place, so hold your pot inside and check the spacing feels snug before committing. You can do one or two rows of alternating knots depending on how deep you want the basket. A single row suits small pots; two rows of alternating square knots gives a deeper cradle that suits heavier or taller pots. After the last row of basket knots, bring all 16 cords together and tie a large overhand knot or a second gathering knot about 5–8cm below the basket. Trim the tail cords to your preferred fringe length — 10 to 20cm is typical. For a fluffy fringe, unravel each cord end with your fingers and comb with a stiff brush. For a cleaner look, cut the tails at an angle and leave them twisted. Hang your finished hanger, lower your pot in from the top, and adjust the basket spacing one final time while the pot is in place.
Written by

Emma Clarke
Mixed Media & Resin Art Specialist
Emma merges science and art in her mixed media practice. She specializes in resin pouring, alcohol inks, and unconventional material combinations.