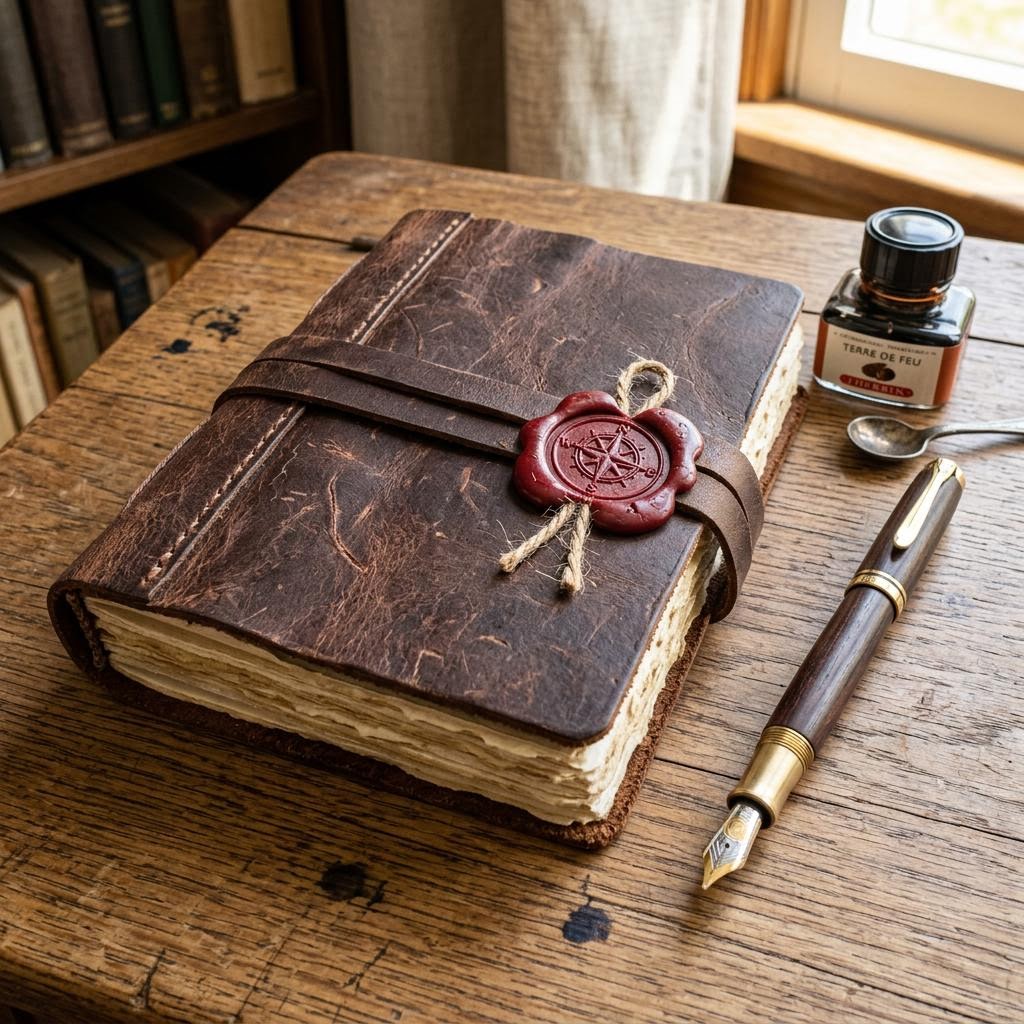
Learn basic bookbinding to craft a beautiful DIY leather journal.
There is something almost irrational about how much I love a good blank journal. I have bought hundreds of them, and I still reach for a new one every few months. But the day I made my first DIY leather journal — a slightly lopsided A5 with hand-stitched signatures and a cover cut from a scrap of vegetable-tanned leather — I stopped buying and started making. That shift changes you.
Leatherbound bookbinding is one of those crafts that looks intimidating from the outside and is surprisingly approachable once you start. You need almost no tools to begin: a sharp craft knife, an awl, a bookbinding needle, waxed linen thread, and a cutting mat. A bone folder helps, but the back of a spoon works in a pinch. The leather itself is the splurge. Aim for vegetable-tanned leather around 2–3 oz weight — it's flexible enough to fold without cracking but stiff enough to protect your pages.
The basic structure of a hand-sewn journal is a stack of folded paper signatures (usually 4–5 sheets folded in half each) sewn through punched holes into a leather cover. There are several binding styles — Coptic, long stitch, pamphlet — but for a first project, a simple three-hole pamphlet stitch or a four-hole saddle stitch is satisfying and strong. You don't need to know all the terminology. You just need to know that the thread goes in, out, and ties off.
Paper choice matters more than most tutorials admit. Standard 80gsm copy paper works, but 90–100gsm text weight paper feels noticeably better under a pen and takes ink without bleed-through. If you plan to use the journal for watercolor or heavy marker work, use 120gsm or higher, and reduce your signature count so the pages lie flat. The book needs to open fully, and thick signatures fight you on that.
The most common beginner mistake is punching holes without aligning the signatures properly first. Use a piece of card stock as a template, mark your holes with a ruler, and punch all your signatures stacked together so they match exactly. A single off-center hole means your thread pulls the pages at an angle — not a disaster, but annoying every single time you open the book. Take the extra two minutes. It's worth it.
Once you've made one, you'll make six more. The cover can be stamped, dyed, carved, or left raw to develop its own patina over time. The size is completely up to you — pocket-sized travelers' journals are gorgeous, and large sketchbook formats are dramatic and useful. You can attach a leather cord closure, add a ribbon bookmark, or keep it dead simple. A handmade journal is one of those rare objects that feels better the more it's used.
Materials You'll Need
- Piece of soft leather or faux leather (approx. 8x12 inches)
- Text weight paper (20-30 sheets)
- Waxed linen thread
- Bookbinding needle
- Awl or heavy needle for punching holes
- Bone folder
- Ruler and cutting mat
Step-by-Step
Prepare the Signatures (Pages)
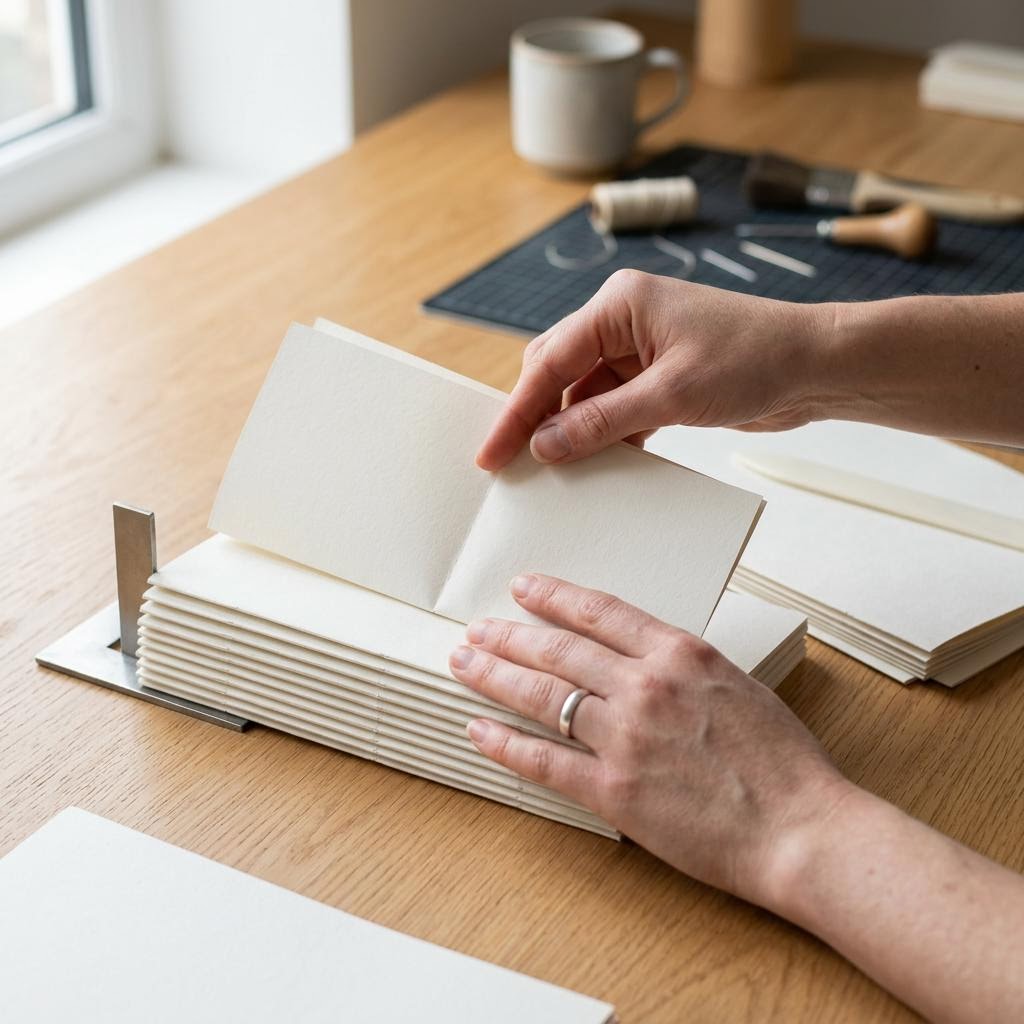
Cut your text-weight paper to twice your desired page size — for an A5 journal, cut sheets to A4 (210 × 297mm). Nest 4–5 sheets together and fold them carefully in half with a bone folder, pressing firmly along the spine to get a crisp crease. This folded bundle is called a signature. Most journals use 3–5 signatures, giving you 48–80 pages total. Stack all your signatures and clip them together, then cut a piece of card stock the same size as one signature spine. Mark your hole positions on the card stock template — typically 3 holes: one 1cm from the top, one 1cm from the bottom, and one dead center. This template ensures every signature lines up perfectly when sewn. Use an awl or thick needle to punch through each signature individually, using the template as your guide. Place each signature on a folded towel for cushioning and push straight down — a twisting motion tears the paper rather than piercing it cleanly. Check that all holes are aligned before moving on; mismatched holes are the number-one source of frustration at the stitching stage.
Measure and Cut the Cover
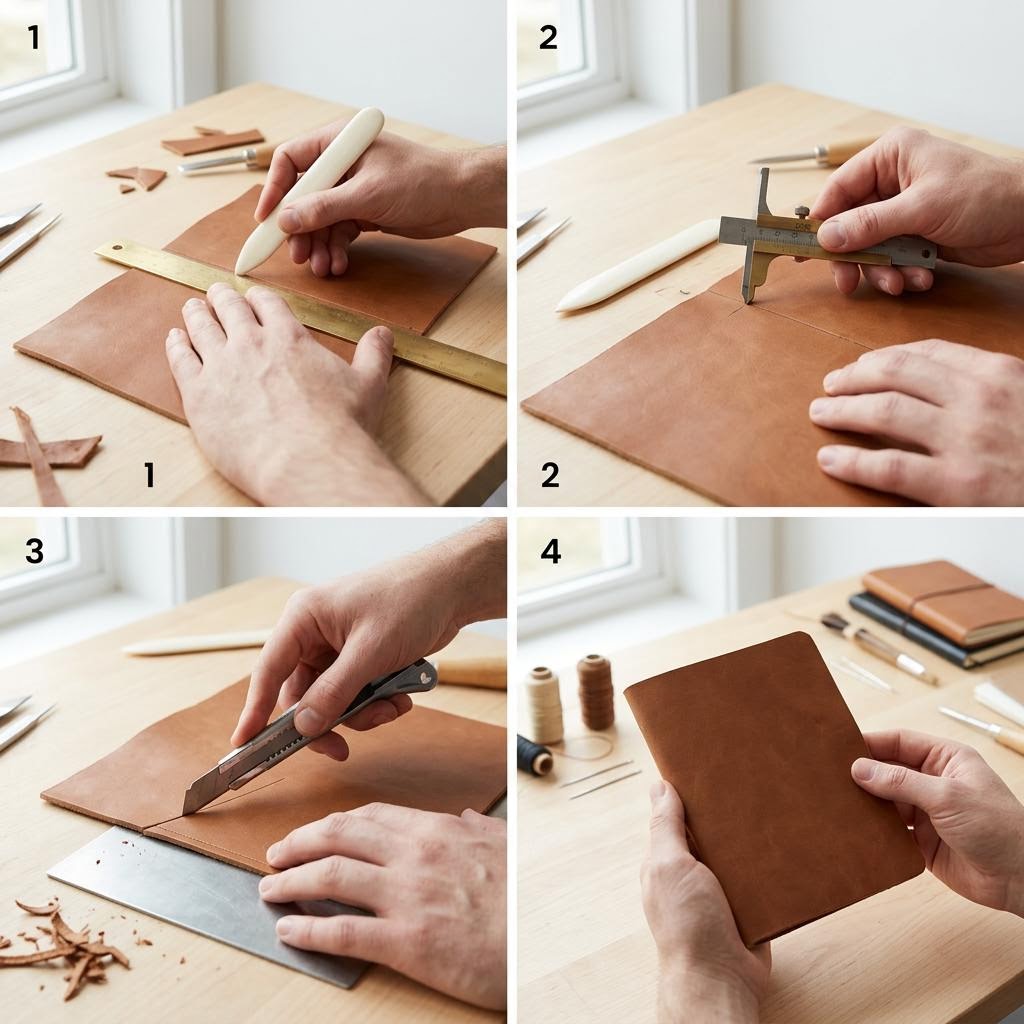
Measure your stacked signatures and add 3mm to the height and width to get your cover dimensions — this small overhang (called the square) protects your pages. For an A5 journal, your cover piece should be roughly 216 × 154mm, wrapping around to cover front, spine, and back in a single continuous piece. Mark the fold lines for the spine with a bone folder and a ruler before cutting. Lay the leather flesh-side up on a cutting mat. Use a metal ruler and a sharp craft knife, drawing the blade toward you in firm, even strokes. Resist the urge to rush through thick sections — multiple light passes give a cleaner edge than one heavy drag. Cut any decorative shape on the corners if you want rounded edges; a coin makes a perfect template. Score the spine fold lines lightly on the flesh side with your bone folder. For leather under 2mm thick, this creates a clean fold. For thicker pieces, you may need to skive (thin) the spine area with a leather skiver to prevent cracking. Lay your signatures into the cover to check the fit before punching any holes — it's much easier to adjust now than after sewing.
Punch the Binding Holes
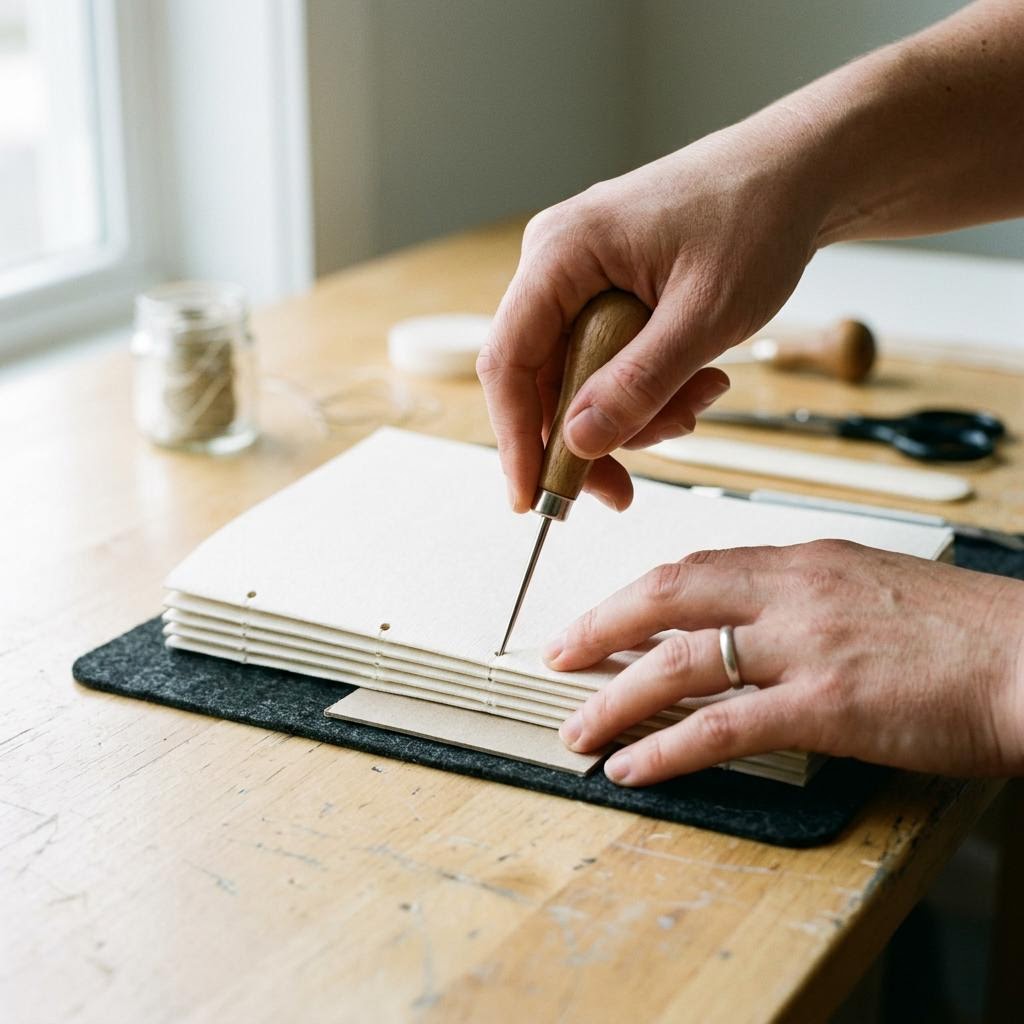
Open your leather cover flat on the cutting mat. Use your paper template to mark the spine hole positions on the inside of the leather spine — the same 3-hole pattern you used for the signatures. Punch through with an awl using firm, even pressure and a small mallet if needed. Leather punches cleaner than paper, but it requires more force. Keep a scrap of wood underneath to protect your mat and get a clean exit hole. Nest your first signature inside the cover, aligning the folded edge to the spine. Check that all holes align between the leather and the paper. Thread a bookbinding needle with about 80cm of waxed linen thread — a length that sounds long but gets used up fast. Pull the thread through until you have equal lengths on each side of the middle hole if using a pamphlet stitch. For a simple three-hole pamphlet stitch: push the needle from inside out through the center hole, then down the outside spine to one end hole, back inside, travel down to the other end, back outside, and return to center. Pull firm but not tight enough to tear the paper. Tie off with a square knot around the center thread and trim to about 1cm. Done — and it holds remarkably well.
Stitch the Journal Together
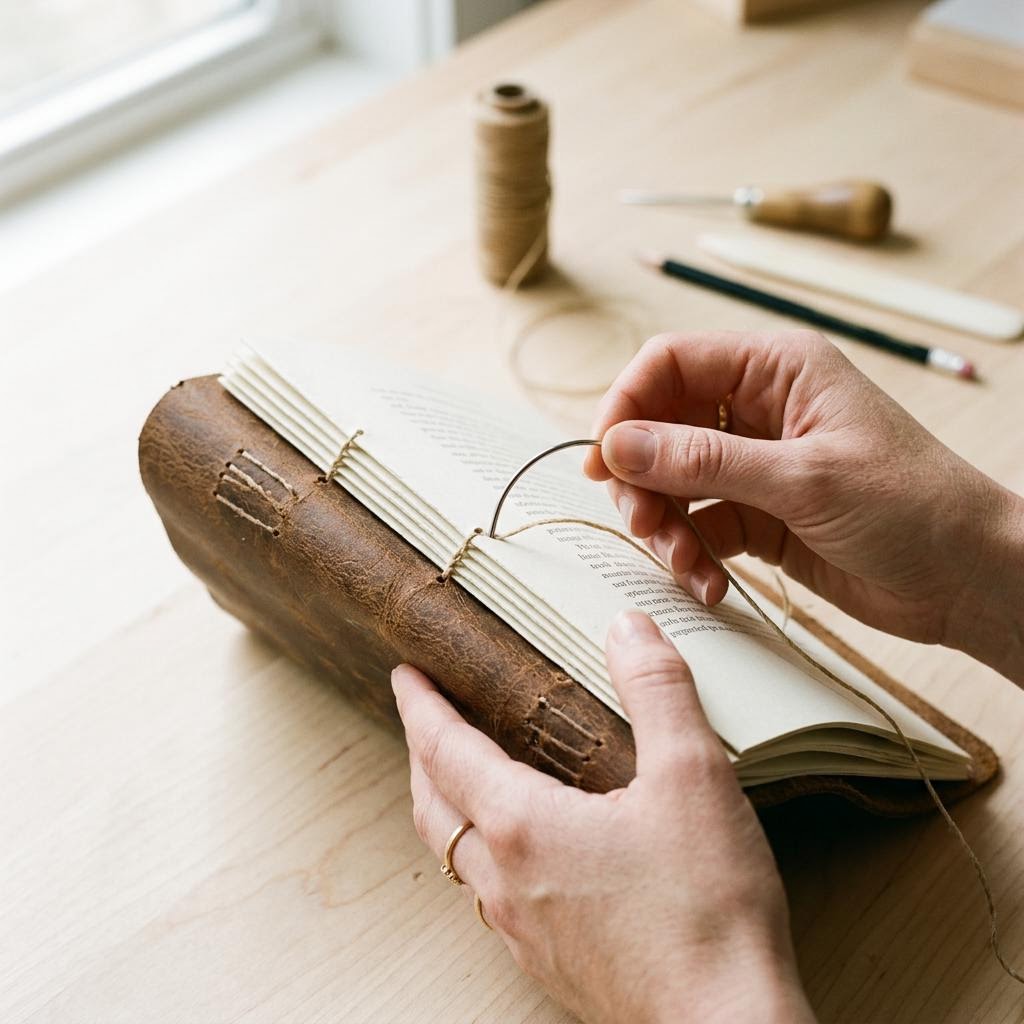
If you're using multiple signatures with a long stitch or Coptic binding, work through them one at a time, linking each to the previous with a kettle stitch at the top and bottom holes. The kettle stitch is a small loop through the exposed thread of the signature below — it sounds fiddly but becomes second nature by the third signature. Keep your tension consistent; too loose and the book will feel sloppy, too tight and the thread cuts into the paper. Once all signatures are sewn in, close the journal and press it firmly under a stack of heavy books for at least 30 minutes. This helps everything settle and flattens the spine. Then open it and run your bone folder firmly along each signature fold from the inside. This step is often skipped, but it makes the pages lie flat when the book is open — the difference is noticeable. Finish the leather cover edges with a leather edge slicker or a damp cloth and burnishing tool, rubbing firmly until the cut edge smooths out. A light coat of beeswax or leather conditioner on the exterior will protect the cover and give it a beautiful sheen. The journal is structurally complete; how you decorate the cover from here is entirely yours.
Written by

Sarah Mitchell
Fiber Arts & Macramé Expert
Sarah has been knotting, weaving, and stitching for over a decade. Her work blends traditional fiber techniques with modern minimalist aesthetics.