Shibori Dyeing at Home: Indigo Folding Techniques
Master shibori dyeing to create stunning indigo geometric patterns.
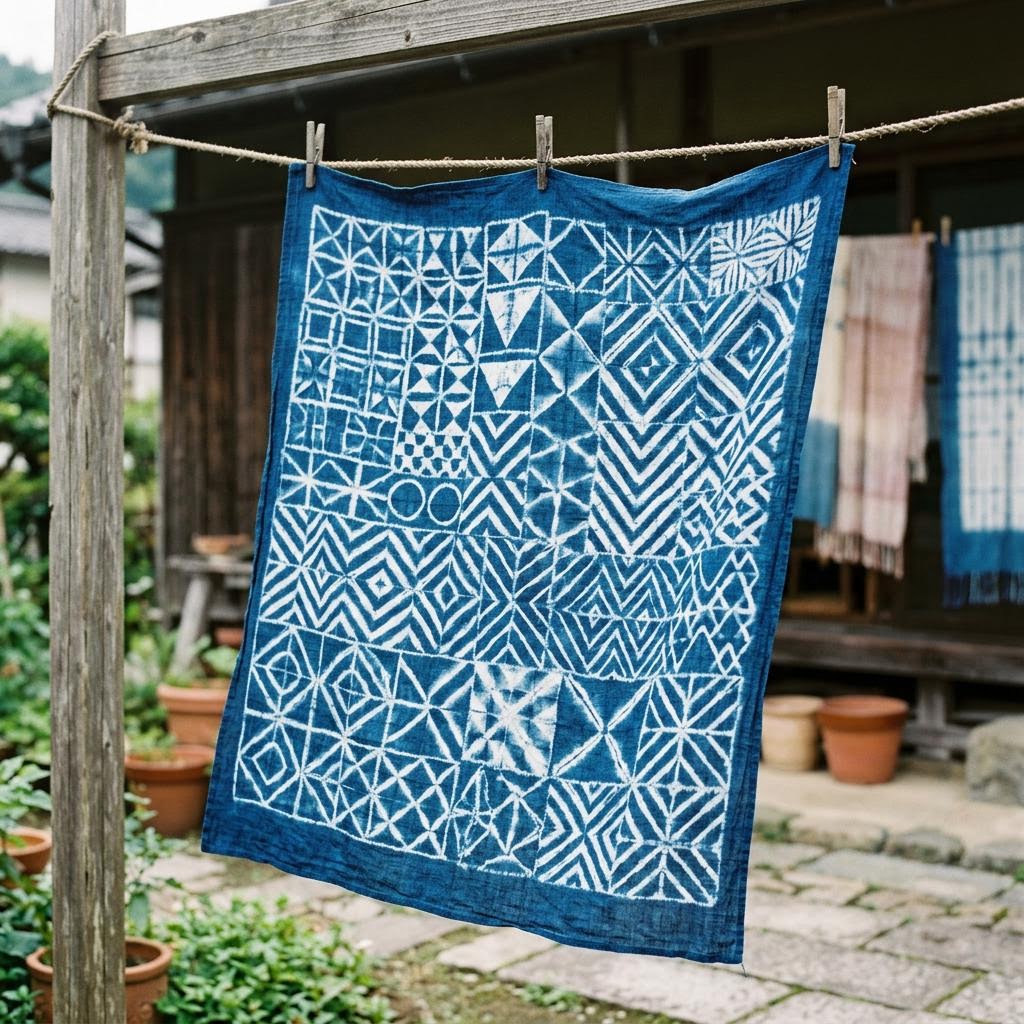
Shibori is a Japanese term for a family of resist-dyeing techniques that create patterns by preventing dye from reaching certain areas of the fabric. The word comes from the verb shiboru, meaning to wring, squeeze, or press — actions that describe the physical manipulation of fabric that is central to the technique. Japanese shibori encompasses at least six distinct methods, each producing characteristic patterns: itajime (fold and clamp), kumo (pleat and bind), arashi (pole-wrapping), ne-maki (root binding), miura (looped binding), and ori-nui (stitched resist). Each method has its own visual vocabulary.
Indigo is the traditional dye for shibori, and the pairing is so historic and so visually perfect that most contemporary shibori work still uses it. Indigo-dyed shibori fabric — white resist patterns on deep blue grounds — is one of the most recognizable textile aesthetics in the world. But the resist technique works with any dye that can be applied to pre-mordanted fabric, and contemporary makers produce shibori work in yellows (onion skins, weld), pinks (madder, logwood), and greens (combining yellow and blue dips). Acid dyes on wool and silk produce particularly saturated results with crisp resist edges.
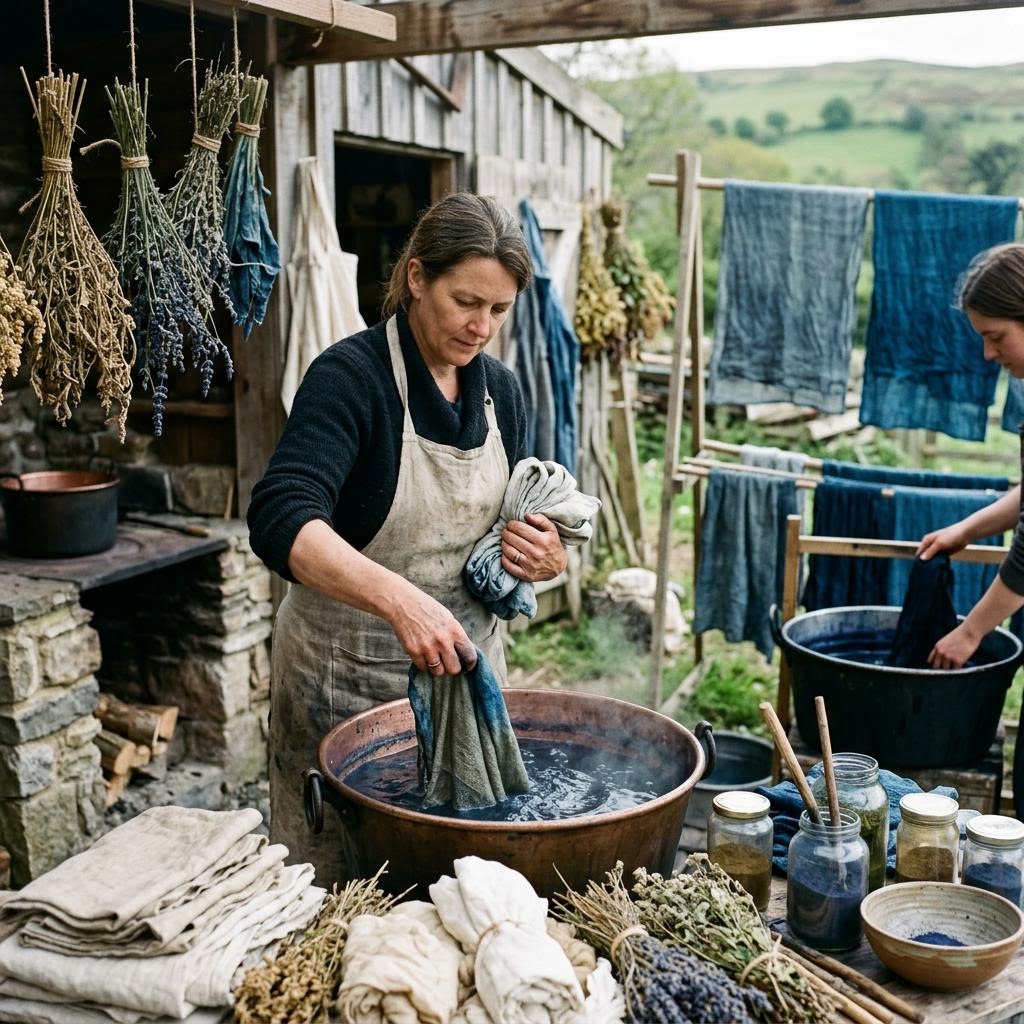
The indigo vat has a living quality that separates it from most other dye processes. An indigo vat must be maintained in a reduced (oxygen-free) chemical state for the dye to work — exposed to air, indigo is insoluble and cannot bond to fiber. The reducing agent (typically sodium hydrosulfite for beginners, or fermented plant material in traditional vats) creates the oxygen-free environment. The vat changes color to signal its health: yellow-green means active and ready; blue-green on the surface means oxidized (stir gently and let settle); brown or gray means depleted. Reading a vat's health is a skill developed through experience.
The oxidation step — lifting the fabric into air after each dip — is not just procedure but spectacle. Watching fabric transform from yellow-green to teal to vivid blue over sixty seconds as the indigo oxidizes never loses its appeal, regardless of how many times you have seen it. The depth of blue is determined by the number of dips: one dip produces a light sky blue, five dips a medium sapphire, ten or more a deep navy. The relationship between dip count and color depth is non-linear — the early dips produce the most significant color change, while later dips add increasingly subtle deepening.
Pattern crispness in the resist areas depends on how tightly the fabric is bound or clamped. Loosely wrapped rubber bands produce blurry, soft-edged resist areas with significant dye penetration into the supposed resist zone. Tightly clamped acrylic or wood shapes produce crisp, hard-edged geometric resist patterns with very little dye bleed. The aesthetic choice between soft organic patterns and geometric precision is controlled by binding tightness. Many makers deliberately vary the tightness across a piece to create areas of different pattern character in the same cloth.
Shibori fabric is beautiful as a finished textile on its own, and the natural next step is to make something with it. Cushion covers and pillow cases show off large patterns at a useful scale. Wall hangings frame the fabric as art without needing construction skills. Tote bags and pouches are practical and require minimal sewing. Clothing is possible but requires fitting and garment construction skills that sit outside the dyeing craft itself. The most accessible starting point is a simple pillowcase: a single piece of pre-sewn fabric with only one hem, large enough to show the pattern dramatically.
Materials You'll Need
- Pre-reduced indigo dye kit
- White cotton or linen items
- Rubber bands, twine, or zip ties
- Small wooden blocks or acrylic shapes
- Two 5-gallon buckets
- Long stirring stick
- Rubber gloves
Step-by-Step
Preparing the Indigo Vat
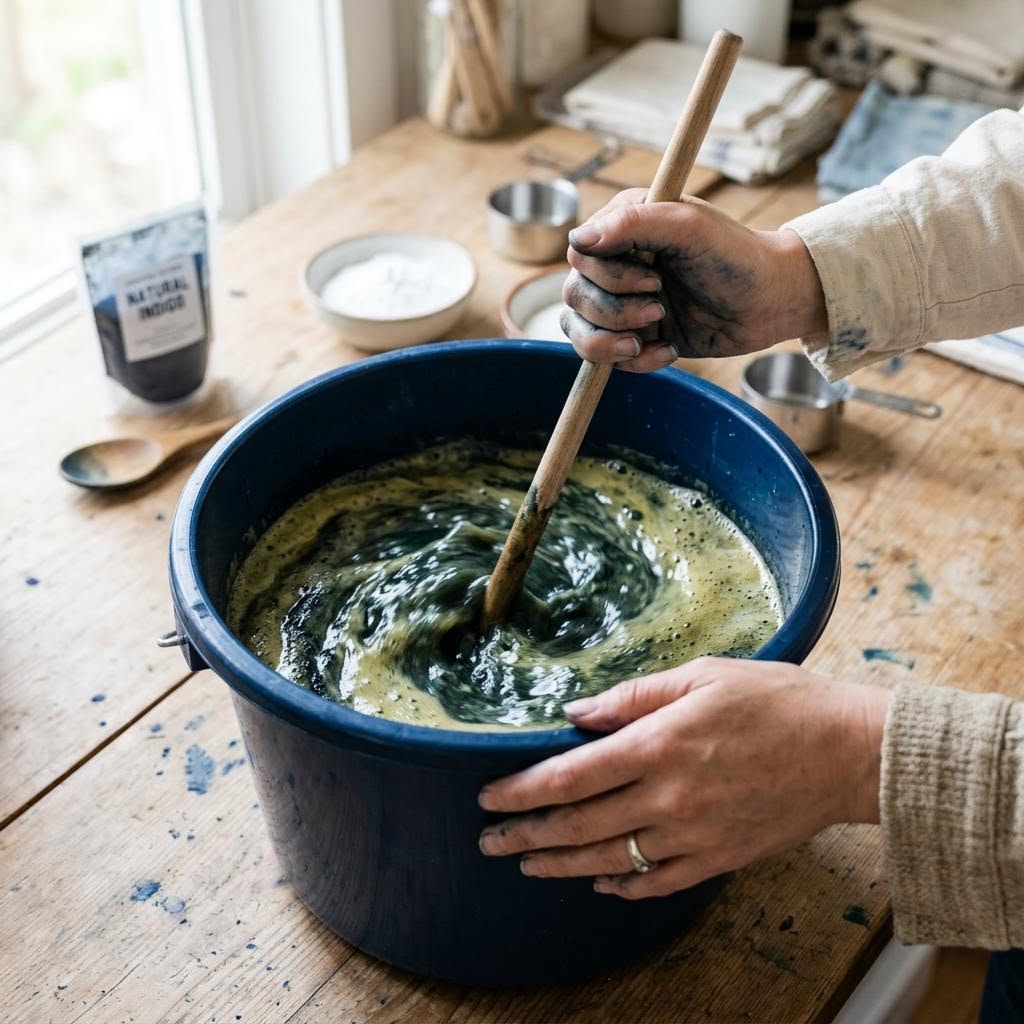
An indigo vat is a living chemistry system where indigo dye exists in a reduced (dissolved) state that can bond to fabric. When fabric leaves the vat and contacts air, the indigo oxidizes back to its insoluble form and turns blue — the color literally develops before your eyes as you watch the fabric go from yellow-green to teal to blue over thirty to sixty seconds. This magical transformation is what makes shibori dyeing so compelling. The simplest beginner vat is a pre-reduced indigo kit (sold as a three-ingredient or 1-2-3 kit): indigo, reducing agent (sodium hydrosulfite), and alkali (soda ash or lye). Mix in hot water according to kit instructions, stir gently but thoroughly without introducing bubbles, and let it settle for 15 minutes until a metallic blue-green 'flower' forms on the surface and the liquid beneath is clear yellow-green. This color tells you the vat is reduced and ready. The vat must stay warm (40–50°C) throughout dyeing — set the container in a larger vessel of hot water, or use a slow cooker on the 'keep warm' setting.
Folding and Binding (Itajime and Kumo techniques)
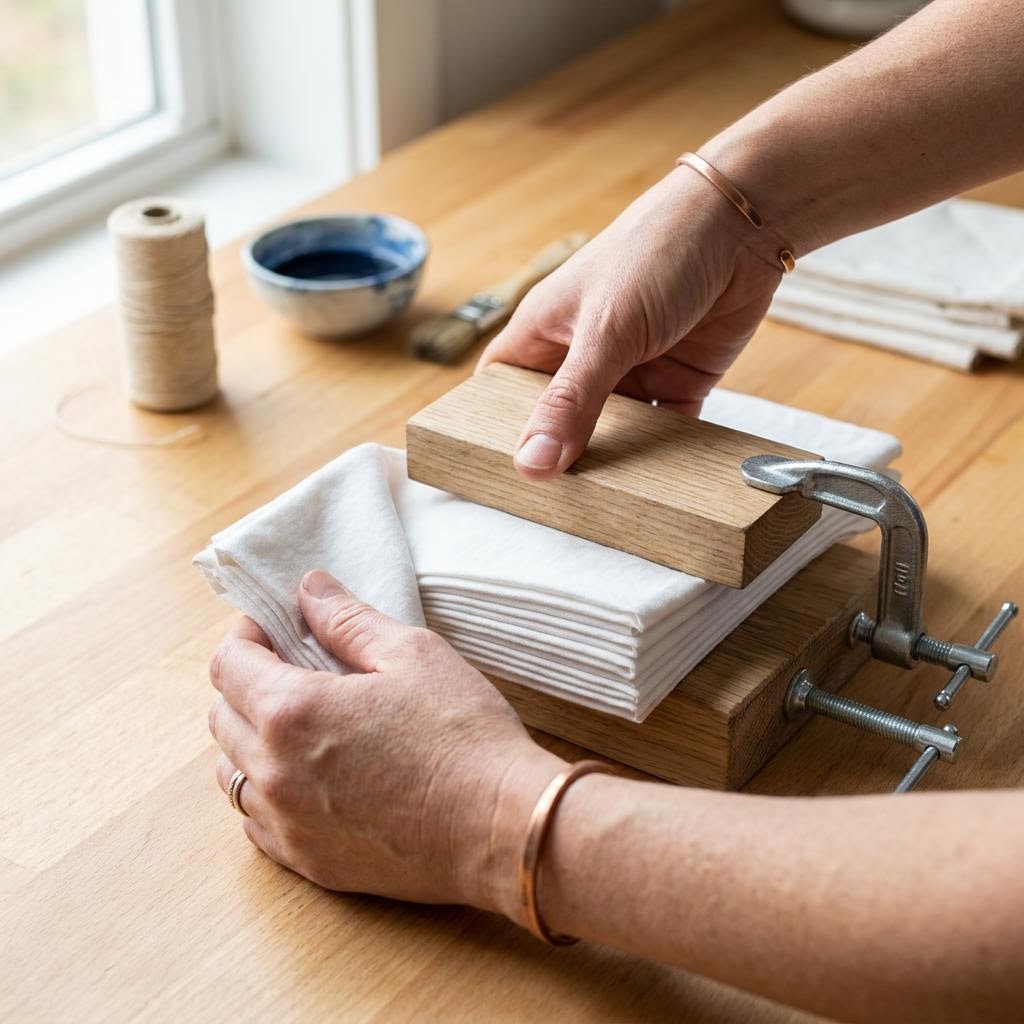
Pre-mordanted or scoured cotton or linen fabric gives the clearest shibori results; wool and silk work too but behave differently. Wet the fabric thoroughly in plain water before dyeing — wet fibers absorb dye more evenly than dry ones. Wring out well but do not wring dry. Itajime shibori uses folding and clamping between shaped pieces of wood, acrylic, or thick cardboard. Fold the fabric accordion-style lengthwise, then accordion-fold across the short direction to create a small square packet. Clamp identical shapes on both sides of the packet (wooden chopsticks, binder clips, acrylic shapes, coins) and secure with rubber bands or clamps. The clamped areas resist the dye; everything else will be blue. Kumo shibori uses gathering and binding: pinch the fabric at a point and bind it tightly with rubber bands at intervals down the gathered section. The bound areas resist; the fabric between bindings dyes unevenly, producing a spidery, spotted pattern. Combine both techniques on a single piece of fabric for complex, layered results.
Dipping and Oxidizing
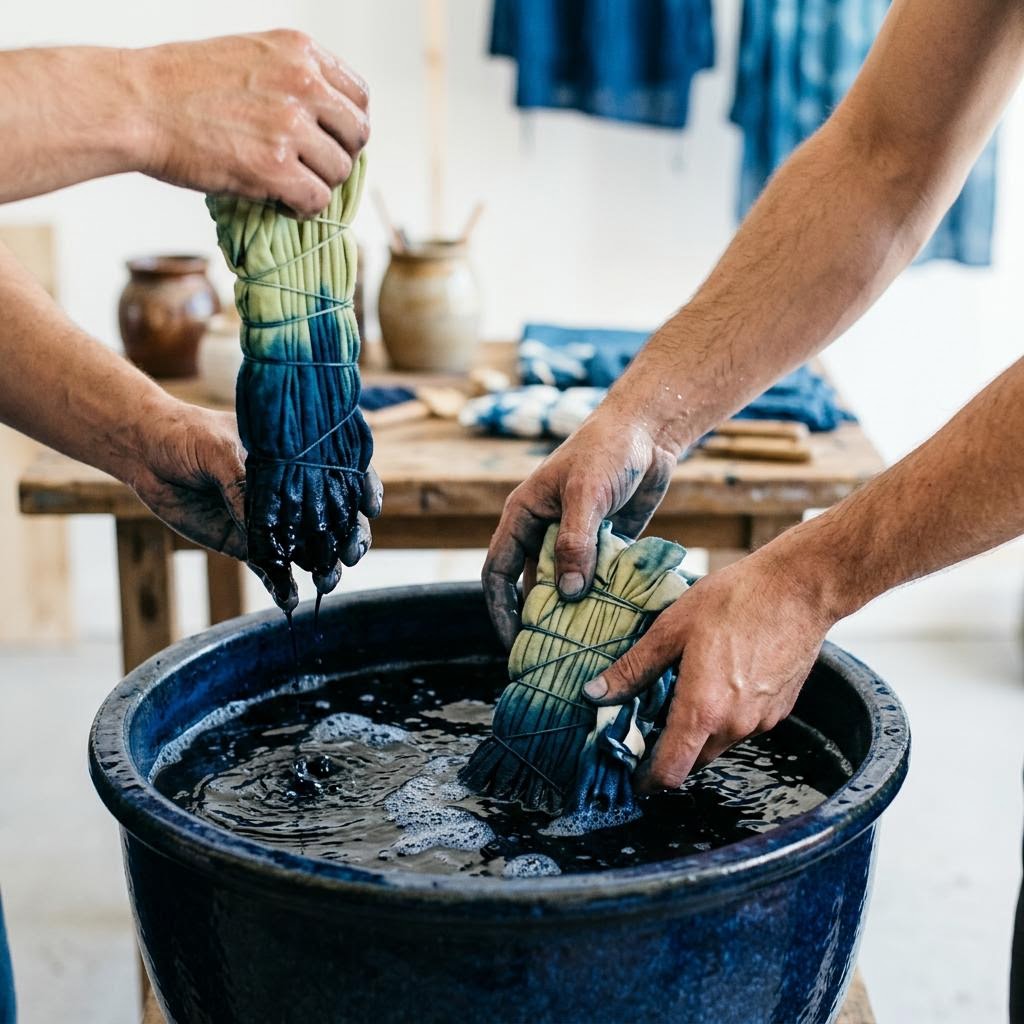
Remove the surface 'flower' from the vat with a spoon before inserting fabric — the oxidized indigo on the surface can deposit unevenly on the fabric if it touches it. Lower the bound fabric slowly into the vat below the surface, keeping it completely submerged for 3–5 minutes for the first dip. Gently move the fabric around without splashing — bubbles introduce oxygen into the vat, which weakens the reduction. Keep fabric below the surface at all times while submerged. Lift the fabric slowly and allow it to drip over the vat for 30 seconds, then hold it in the air and watch the color transformation: yellow-green to teal to medium blue takes about 60 seconds. This oxidation is essential — the dye must be exposed to air to bond permanently. Rinse excess drips back into the vat, then return the fabric to the vat for a second dip if you want a deeper blue. Each additional dip darkens the color; most shibori pieces go through 3–8 dips. Between dips, allow full oxidation (at least two minutes in air) before re-submerging.
Washing and Unbinding
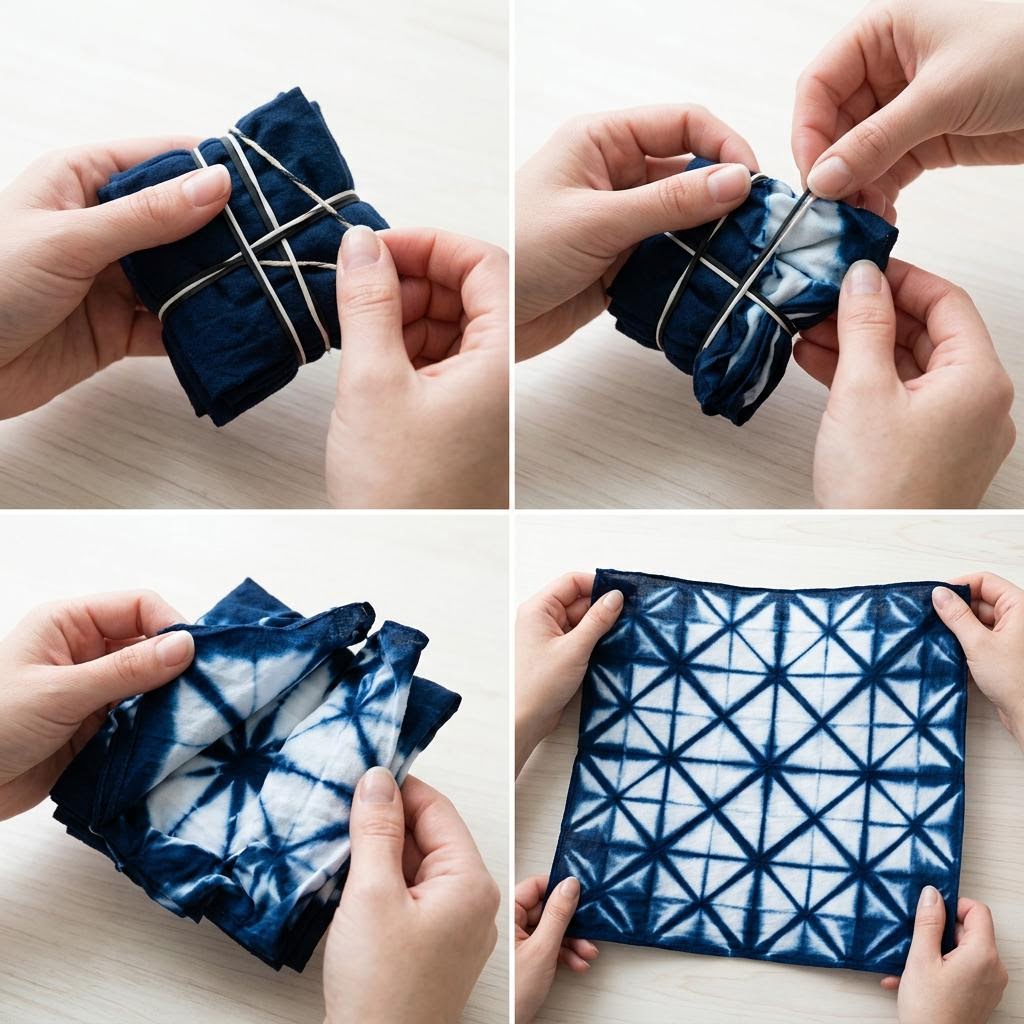
After the final dip and full oxidation (allow the fabric to oxidize in air for at least five minutes after the last dip), rinse the bound fabric under cool running water until the water runs clear. Do not unbind the fabric until after rinsing — unfolding while still full of loose indigo causes the dye to redeposit in the resist areas, softening the sharp lines that make shibori patterns distinctive. Once rinsed clear, carefully remove all rubber bands and clamps. Unfold slowly, taking care not to tear the wet fabric at folds. The resist pattern will be revealed as white or very light areas against the indigo blue — the contrast between them is what creates the design. Wash the fabric in warm water with a drop of neutral pH soap to remove any remaining loose indigo, then rinse thoroughly. Hang to dry away from direct sunlight (UV fades indigo over time). The color will continue to oxidize and deepen slightly as it dries. Wash shibori pieces separately for the first few washes as residual indigo may continue to bleed.
Written by
Hannah Williams
Upcycling & Sustainable Craft Advocate
Hannah makes beautiful things from things other people throw away. Her upcycling projects champion sustainability without ever sacrificing style.