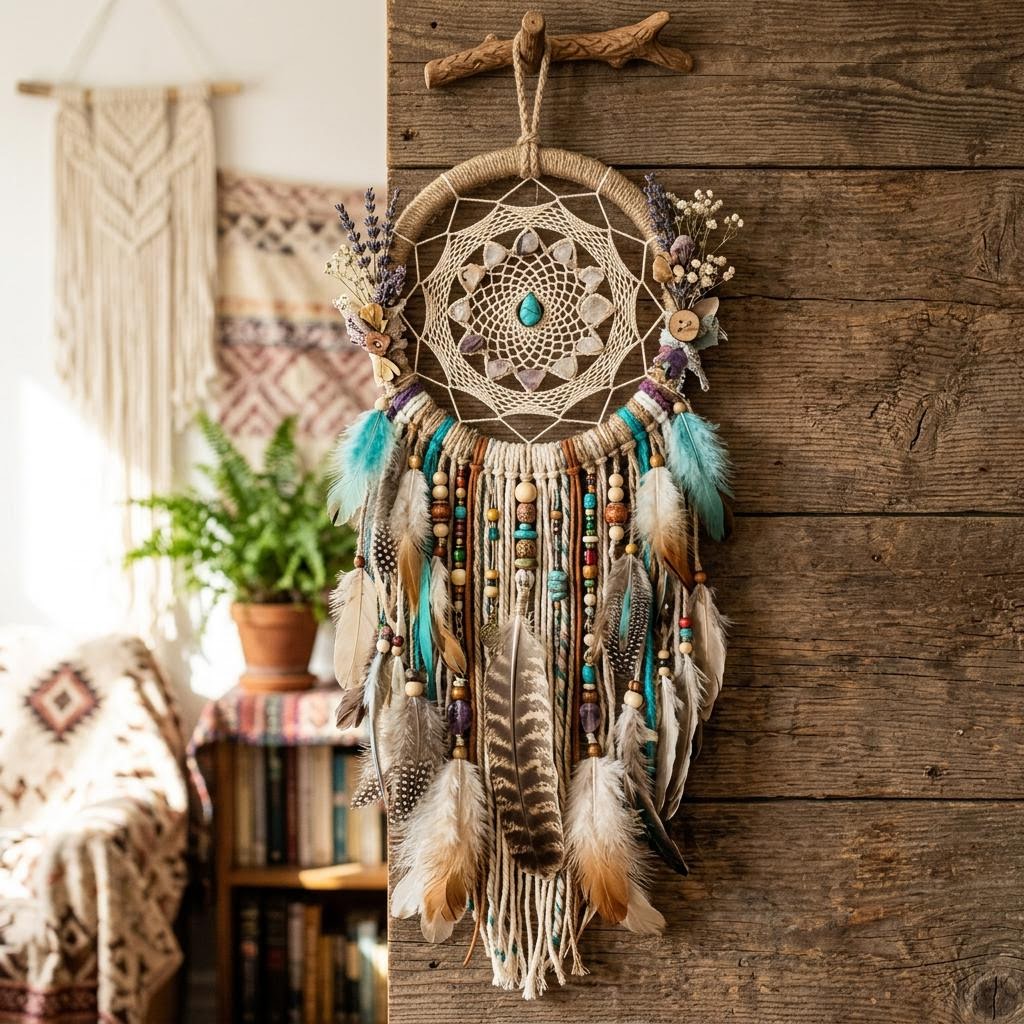
Learn how to make a dreamcatcher with authentic weaving patterns.
The dreamcatcher is one of the most recognizable objects in North American indigenous craft tradition, originating with the Ojibwe (Chippewa) people of the Great Lakes region. In the original tradition, small willow hoop dreamcatchers were hung above sleeping children — the web was said to filter dreams, allowing good dreams to pass through the center hole and flow down the feathers to the sleeper, while bad dreams were caught in the web and burned away by morning light. The craft and its symbolic meaning spread to other First Nations peoples through trade and cultural exchange.
The contemporary craft dreamcatcher — the version made in most craft tutorials — draws on this tradition but is typically disconnected from its spiritual context. This is worth being aware of, particularly if you plan to give dreamcatchers as gifts or sell them. Making a dreamcatcher as a decorative textile piece with knowledge of its origins is different from claiming the object carries its traditional protective function. With that awareness in place, the craft itself is genuinely beautiful and the techniques — wrapping, knotting, weaving — are real traditional fiber arts skills.
The web tension is the most important technical element. A web that is too loose sags in the center and loses the geometric quality that makes dreamcatcher designs distinctive. A web that is too tight distorts the hoop, pulling it out of round. The correct tension produces a web that is taut and flat, springing back slightly when touched. The tension is controlled by how firmly you pull each half-hitch wrap around the spokes, and it should remain consistent throughout the weaving process.
The hoop material affects the character of the finished object significantly. Metal hoops (the most widely sold) produce a clean, contemporary look with perfect circularity. Willow or grapevine bent into a circle has a more organic, handmade quality and connects the craft to its traditional roots more directly. Embroidery hoops work well as a beginner frame because they are precisely round, available in many sizes, and can be wrapped to look intentional rather than like craft-store components. Solid wood hoops (turned on a lathe) are the most expensive option and produce the most professional-looking base.
Tail materials offer the widest creative latitude. Traditional dreamcatchers use natural feathers, sinew, and leather cord. Contemporary versions use whatever creates the aesthetic the maker wants: satin ribbon, suede cord, yarn, macramé cord, leather strips, dried flowers, crystal beads, dyed feathers, tassels. Long hanging tails (25–35cm) read as dramatic and statement-making; shorter tails (10–15cm) give a more balanced, restrained look. Three hanging tails is the most common arrangement; five tails creates a fuller, more elaborate effect.
Size calibrates the visual impact. A 10cm dreamcatcher is a delicate, intimate object that works well hung in a cluster of three or five at different heights. A 30cm dreamcatcher is a room-scale statement piece that needs substantial wall space. A 50cm dreamcatcher with long trailing tails becomes the focal point of a wall. Most tutorials target 15–20cm, which is versatile enough to work in most spaces and small enough to be manageable for a first project. Make two or three small ones before attempting a large one — the skills are identical but the scale of any errors becomes proportionally larger.
Materials You'll Need
- Metal or wooden hoop (5-8 inches)
- Suede lacing or ribbon
- Waxed nylon thread or sinew
- Pony beads
- Feathers
- Scissors
- Craft glue
Step-by-Step
Wrapping the Hoop
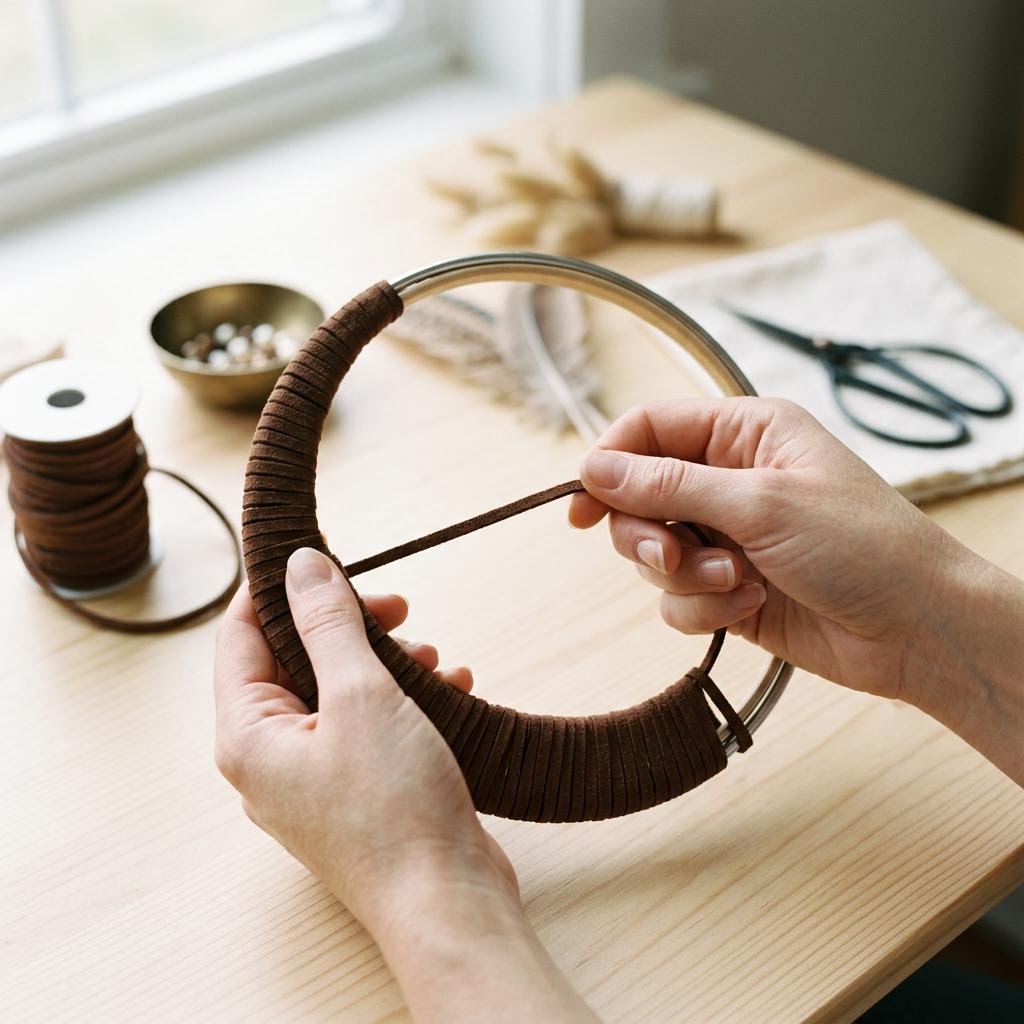
Choose a metal or wooden embroidery hoop or a bent willow twig ring — both work well, though the willow ring has a natural, organic look that complements the craft's aesthetic. Sizes from 15cm to 30cm are most practical. Tie your wrapping cord to the hoop with a secure knot and begin winding the cord around the ring tightly, covering the previous wrap slightly with each new one so no hoop shows through. Wrap all the way around the hoop with no gaps. You can use a single color or change colors partway through by tying on a new color and weaving the join into the back of the wraps. Satin cord, suede cord, and natural cotton all look different and create distinct finished aesthetics — satin cord gives a polished, contemporary look while natural cotton and suede look earthy and handcrafted. When the wrapping meets the starting point, tie off securely and hide the knot at the back of the hoop. The wrapping should feel firm — loose wraps create an unstable base for the web.
Weaving the First Web Layer
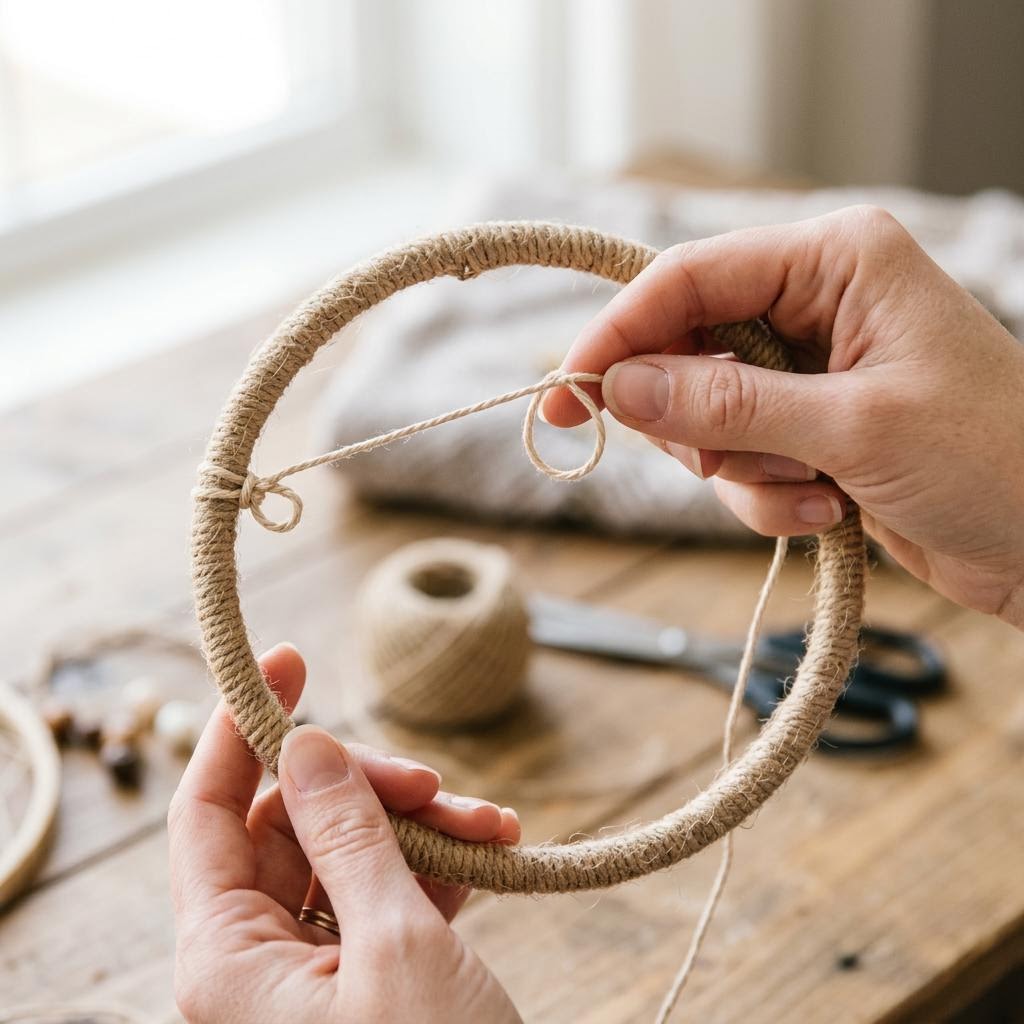
Tie the web thread to the hoop with a secure knot and begin creating the foundation web. Work across the hoop with evenly spaced anchor points on the frame — most traditional patterns create 7 or 13 anchor points (odd numbers work best for creating the spiral). From each anchor point, loop the thread around the hoop twice and move to the next point, spacing anchors evenly around the entire circle. Once the initial spokes are in place, begin spiraling outward from the center. Bring the thread across to the nearest spoke, wrap it once around the spoke (a half-hitch knot), move to the next spoke, wrap, and continue spiraling outward. Keep each wrap evenly spaced from the last to create a regular, even web pattern. Pull each wrap snug but not so tight that the spokes bow inward — the web should be taut without distorting the hoop shape. Work slowly and evenly in the first round; subsequent rounds naturally find their rhythm.
Continuing the Web and Adding Beads
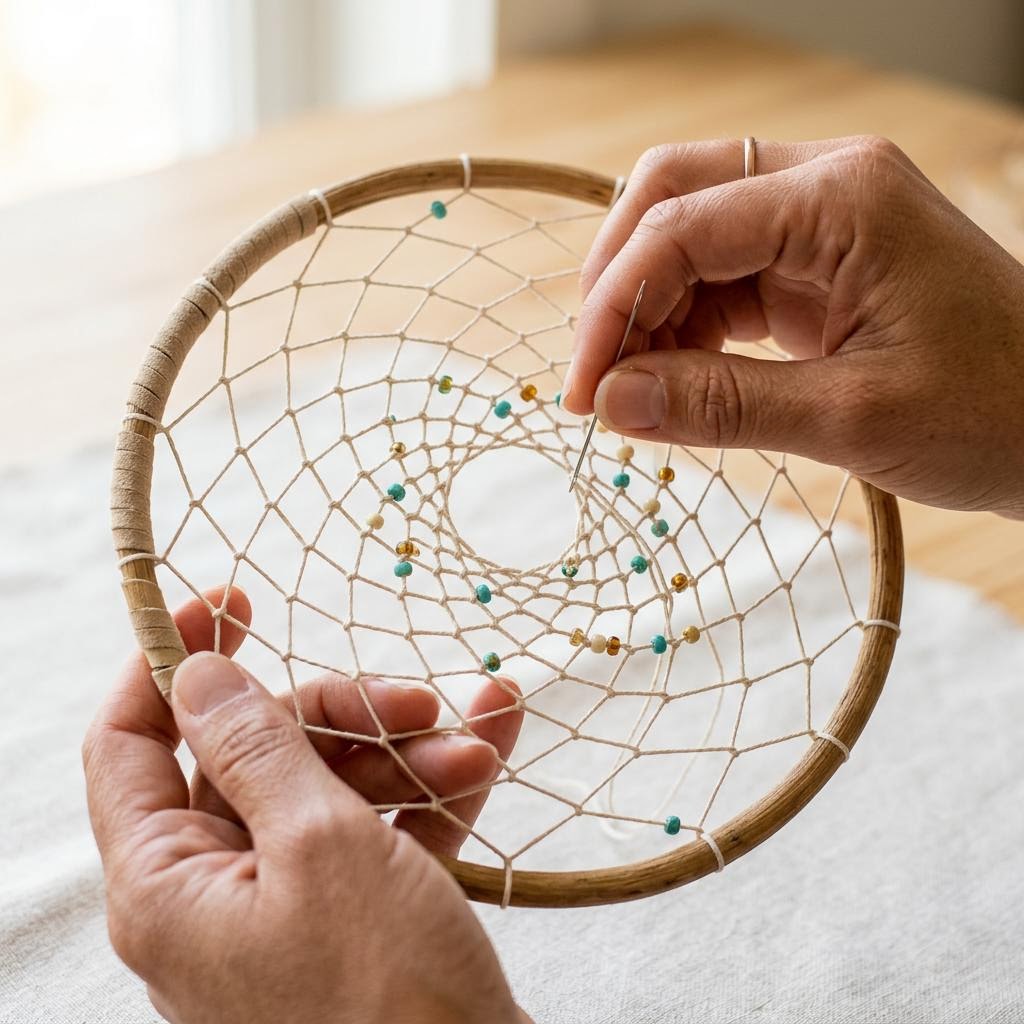
Continue spiraling outward, changing colors as desired by tying on new thread and weaving the tail end back into the web on the reverse side. Color changes create concentric rings of color in the web — plan these before starting so you know approximately how many rounds each color will cover. To add beads, thread them onto the working thread before wrapping the spoke — the bead slides to the spoke point and stays in place. Seed beads and small round beads work best; large beads distort the web shape. Leave a gap in the web about 1–2cm from the hoop edge — this gap becomes the 'window' of the dreamcatcher through which good dreams pass. Some makers leave the outer 2–3 rounds of spokes unconnected (no spiral wrapping) to create a natural opening. When you reach your desired stopping point, tie off the web thread securely at the hoop with two half-hitch knots and trim, weaving the tail back through several wraps to hide it. The web should feel firm and stable — push the center gently; it should spring back without distorting.
Attaching Tails and Feathers
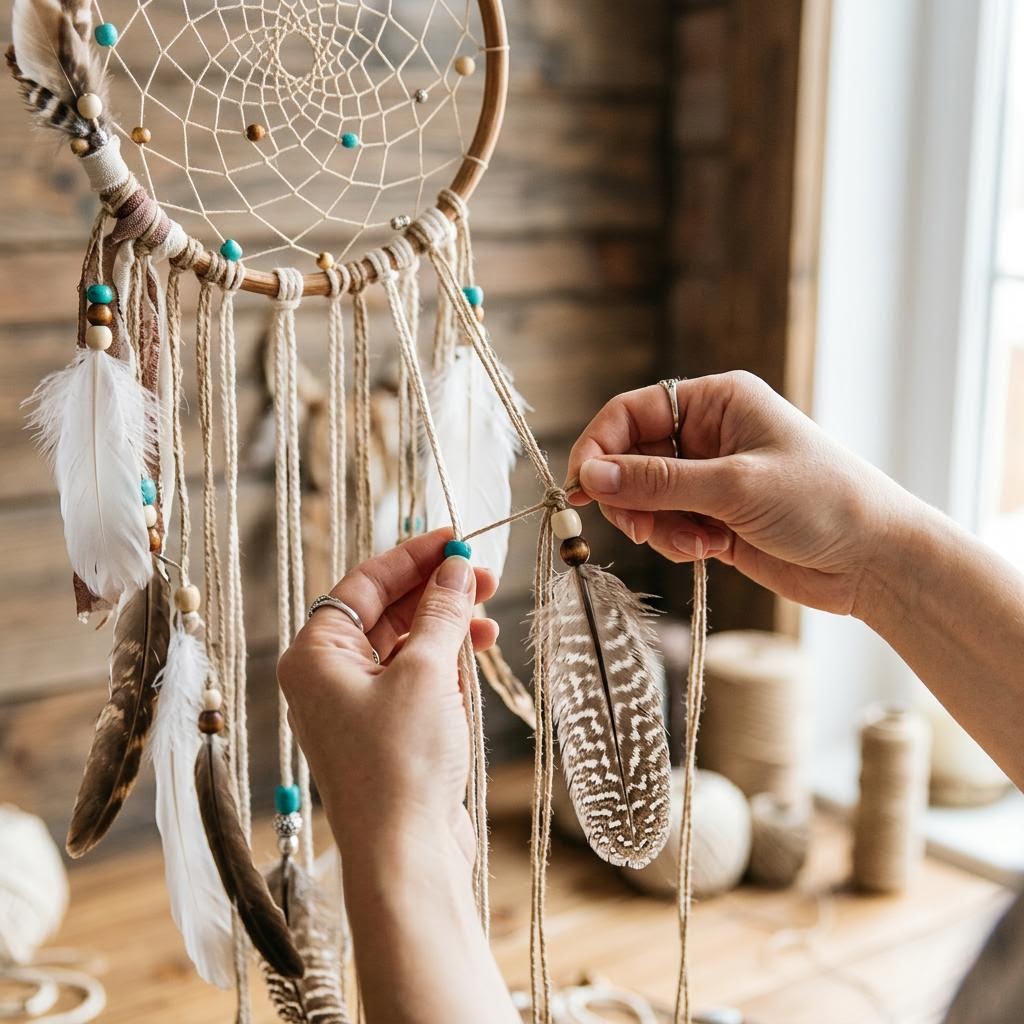
Cut three to five hanging strands of varying lengths from the bottom of the hoop — the longest strand should hang about 25–30cm below the hoop for good visual proportion. Fold each strand in half and attach it to the hoop with a lark's head knot (the same knot used in macramé): fold in half, push the loop through the hoop from front to back, bring the two tails through the loop, and pull tight. Space the hanging strands evenly across the bottom quarter of the hoop. Thread beads onto the hanging strands before attaching feathers — push beads to varying heights on each strand for visual interest. Attach feathers by sliding the quill end up under a bead that has been positioned to hold it, or by wrapping the quill with thread several times and tying off. Natural feathers (found feathers that are clean and dry) and craft feathers both work. Mix textures — combining a fluffy marabou feather with a striped flight feather creates more visual interest than uniform feathers. Add the hanging cord last: a simple loop tied to the top of the hoop at the wrapping point that created the strongest anchor.
Written by

Zoe Turner
Textile & Embroidery Artist
Zoe embroiders the world she wants to see. Her hoop art blends traditional needlework stitches with contemporary illustration and botanical motifs.